Laser Measurements 101
Part 4: Changing Wavelengths
Lasers are like tiny nuclear reactors, but when these tiny reactors melt down, they release far less smoke. Why is this the case, and how will it help us in our quest to measure distance?
Last time, we found out we can measure distance using a single laser, but only if we can change its wavelength while it operates. This time I will show how to make that wavelength change by giving you 4 pieces of information:
- How lasers work
- Why lasers are current devices
- How Non-Temperature effects change the wavelength
- How Temperature effects change the wavelength
How Lasers Work
First, let’s discuss the fundamental operation of lasers, and together we will discover how we can use that to our advantage to change their operating wavelength!
Disclaimer: In this first section, I am going to drastically oversimplify atomic physics. If you are an expert on this subject, shield your eyes now.
There are thousands of types of lasers! Most of them aren’t that useful, and today we will focus on just one type; the semiconductor laser. Usually it’s called the laser diode.
As ‘diode’ in the name implies, just like an LED, this laser type only works when voltage is applied in one direction.
Lasers and LEDs are so similar that they were invented in the same year (1962), at the same company (GE), in the same building! Let’s talk about what makes them similar, and then what makes them quite different!

To understand the laser, let’s first understand the LED. The best explanation of this in existence that I’m aware of comes from Veritasium’s video on blue LEDs, from 4:07 to 9:17. If you haven’t seen it, take 5 minutes and watch it! I can’t possibly improve on their explanation of an LED in this blog post.
The executive summary for those that skipped the video, is that the diode is a P-N junction made of a semiconductor material which has 2 bands of electrons. Think of the bands as sections of seating in a theater, a lower floor (preferred), and an upper balcony which only fills up when the lower floor is full. The band gap is the distance between these two sections, which electrons must jump.
If you give an electron a photon (a light particle) with just the right amount of energy, it can absorb that energy and jump up to the section above. Electrons would prefer to be on the lower floor below the band gap, because it’s a lower energy state. If an electron finds itself up in the balcony section, but there are seats below it, it will emit a photon back out, and jump back down to the lower balcony where it prefers.
You can imagine the photons as tiny energy storage mechanisms for the electrons. When an electron “holds” a photon, it’s above the band gap, and when it does not “hold” a photon, it is below the band gap.
You might ask yourself, “what happens if a photon hits an electron when it’s in the higher state, and is already ‘holding’ an electron?”. It’s a great question, I’m glad you asked! Intuitively, it can emit 2 photons! Think about the implications, if we can inject 1 photon, and get back out 2 photons, then we just doubled the amount of light. Now, what if there is another electron nearby already ‘holding’ an electron, and one of our emitted photons hits that one? It will emit 2, and we will have 3 photons! Now all 3 of those can trigger more electrons to emit their photons.
The only meaningful difference between LEDs and laser diodes, is that laser diodes utilize this feedback effect by trapping the light between 2 mirrors, creating an optical cavity.
By trapping the photons bouncing back and forth, this increases the chances of hitting another electron, and keeping the cycle continuing and amplifying!
Everyone likes to brag that LEDs are more ~4x more efficient in creating light than incandescent bulbs. But everyone forgets that lasers are ~4x more efficient than LEDs! The true efficiency king of our era has always been the laser diode!
If you’re keen-eyed you have already spotted the parallels to a nuclear fission chain reaction. The physics are nearly identical, just with different energy levels and wavelengths. There are 2 questions which naturally follow from this:
- In fission reactions, we use material density or neutron density to modulate the feedback to control the reaction. What is the corollary for laser “density”? How can we control this chain reaction?
- If a fission reaction generates immense (sometimes city-destroying) heat when this reaction becomes uncontrolled, then what happens when a laser runs away like this?
Lasers Are Current Devices
Surprisingly, the answer to both questions is the same: electrical current (remember we are only talking about laser diodes here, other laser types will be slightly different). This makes intuitive sense; electrons are jumping up to the ‘balcony level’ and back down, depending on how many are in the material. The more there are, the more electrons will live in a higher state, the more photons will be emitted, and the more feedback will occur!

If you think of it from that framework, it becomes obvious why you cannot drive a laser with a voltage. At low voltages, the impedance is high. In other words, nothing will happen. There are so many empty seats in the lower balcony, you are just filling them up, but nothing is happening!
However, once you get to that critical point of filling the lower section up, the electrons start to move above the band gap, and suddenly the impedance goes to nearly 0!
If you aren’t careful, you blow right past this point, the current goes to \(\infty\) and… and what?
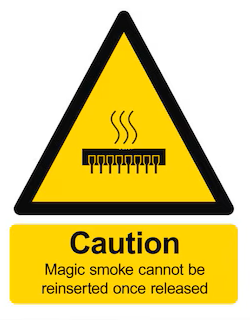
That brings us to question #2, what happens when the reaction runs away from you, there are too many photons, and the reactor “melts down“? Older fission reactor designs (think: Chernobyl, 3-Mile Island, etc) were unsafe because excess heat begets more excess heat.
In lasers however (like in modern fission reactor designs), heat begets less heat! Eventually, the heat melts the internal structure, burning out the mirror on the front of the laser, and releasing the magic smoke. This will decrease the optical feedback, and demote your laser diode back into a lowly LED!
Because it takes some time for the heat to build up, this failure mechanism is the reason you can drive a laser to much higher power levels than it is rated for! That is, as long as you only do so briefly (like a few nanoseconds).
To avoid this catastrophic failure, we design electrical circuits which drive lasers to a specific current, instead of voltage. As long as these electronics are carefully designed (for example, to be quick enough to respond to changes in light levels), we can avoid releasing any magic smoke.
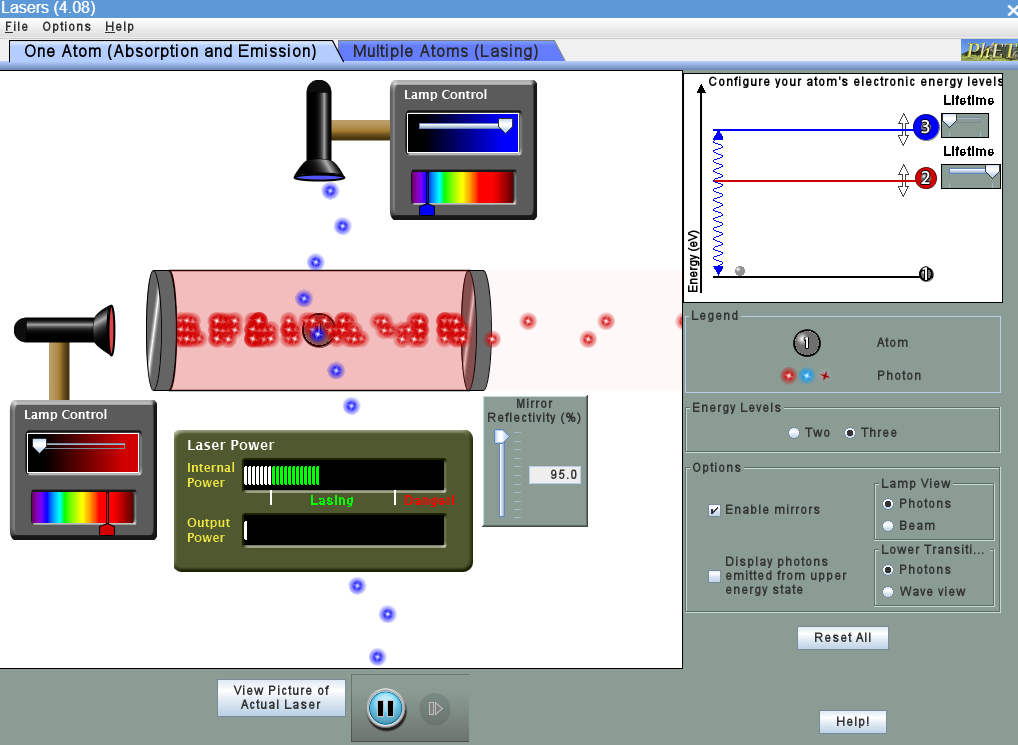
Before we move on to the goal of this post (how to modify a laser’s wavelength), you have to play a game. It’s the laser simulator game from University of Colorado Boulder’s Physics Education Technology (PhET). It’s a ton of fun, MUCH harder than it looks, and helps you visualize what’s happening inside laser cavities! Note: It uses an “optically pumped” design, so instead of using current to inject electrons, you inject photons directly using a light source. It’s not identical to a laser diode, but it’s the same idea.
Changing Wavelengths – Constant Temperature
If you thought the physics oversimplification was extreme before, it’s not going to get any better from here!
When controlling our laser, we only have ~2 inputs: current, and temperature. If we change current, temperature will change, but other stuff will change too. There are 3 primary effects from changing the current, aside from the resulting change in temperature (in other words, these will happen even if you somehow stabilized the temperature to be a constant):
- Free carrier plasma will cause light to go faster (essentially a refractive index change), which will cause a blue shift of ~0.05nm for a 10% carrier density increase (for near-infrared wavelength lasers).
- Band Filling, also called the Burstein-Moss effect, will also cause a blue shift by increasing the band gap. This makes intuitive sense, if the gap is larger, it takes more energy to jump, which means the photons will have higher frequency (higher energy).
- Band Gap Renormalization occurs when the density of the electrons increases, which causes “Coulomb screening”, and lowers the band gap energy. This causes a red-shift, somewhat counteracting the above effects.
These effects are all real and measurable, but they are tiny in comparison to the temperature effects. So for our purposes, we will ignore them.
Changing Wavelengths – Temperature Effects
We may not have direct control over the exact temperature of a laser diode, but varying the current will have a considerable effect on the heat output! From this, there are 2 simple and easy to understand effects of changing the internal temperature of a laser diode.
First, just like most materials, the device will expand as it heats up. This causes the cavity length – the distance between the mirrors – to grow, which can cause a shift towards longer (red) wavelengths.
Second, the refractive index of the gain medium material inside the laser will change with temperature. This is called the thermo-optic effect, and it is by far the most pronounced of all the effects we have discussed. The cavity length change will usually only contribute ~10-20% of the red-shift, with the remaining shift being this refractive index change.
Because the temperature effects are dominant in magnitude, generally a laser diode will red-shift as current increases, and blue-shift as current decreases. The exception to this rule is when the change in current occurs so quickly that the laser does not have time to heat up. This can happen for lasers modulated in the GHz frequency and above. However, slower modulation in the MHz or slower is most relevant for our distance measurement application. In these frequencies, the temperature effects of the modulated current are the largest.
Conclusion
We now know how to modify the wavelength of a laser diode by simply varying the current. At a higher current, we will have a longer wavelength, at a lower current, we will have a shorter wavelength. Next, we need to understand how we can measure the change in periods associated with that change in wavelength, the \(\Delta n\) which we discussed last time. That will be part 5 in our series!
Check out the video below for the full overview of distance measurement in a visual format!